


Creating a Showit Contact Page That Gets Responses
Your contact page isn’t just a form – it’s the final nudge that turns a curious visitor into a client. On a Showit website, where visual storytelling meets customization, this page is a powerful opportunity to invite inquiries, set expectations, and build trust.
Let’s break down how to design a Showit contact page that doesn’t just look good – but actually gets responses.
Set an Intention for the Page
Before you add a single input field, get clear on one thing: What do you want visitors to do here?
- Are you trying to generate client leads?
- Book discovery calls?
- Answer general questions?
- Or all of the above?
When you set an intention, it becomes easier to write meaningful microcopy, choose the right input fields, and design a page that actually converts.
Design with Simplicity and Clarity
Your contact page should feel inviting – not overwhelming. One of the most popular and effective layouts? A two-column canvas:
- Left panel: an image of you, a short message, or a quick FAQ
- Right panel: the contact form
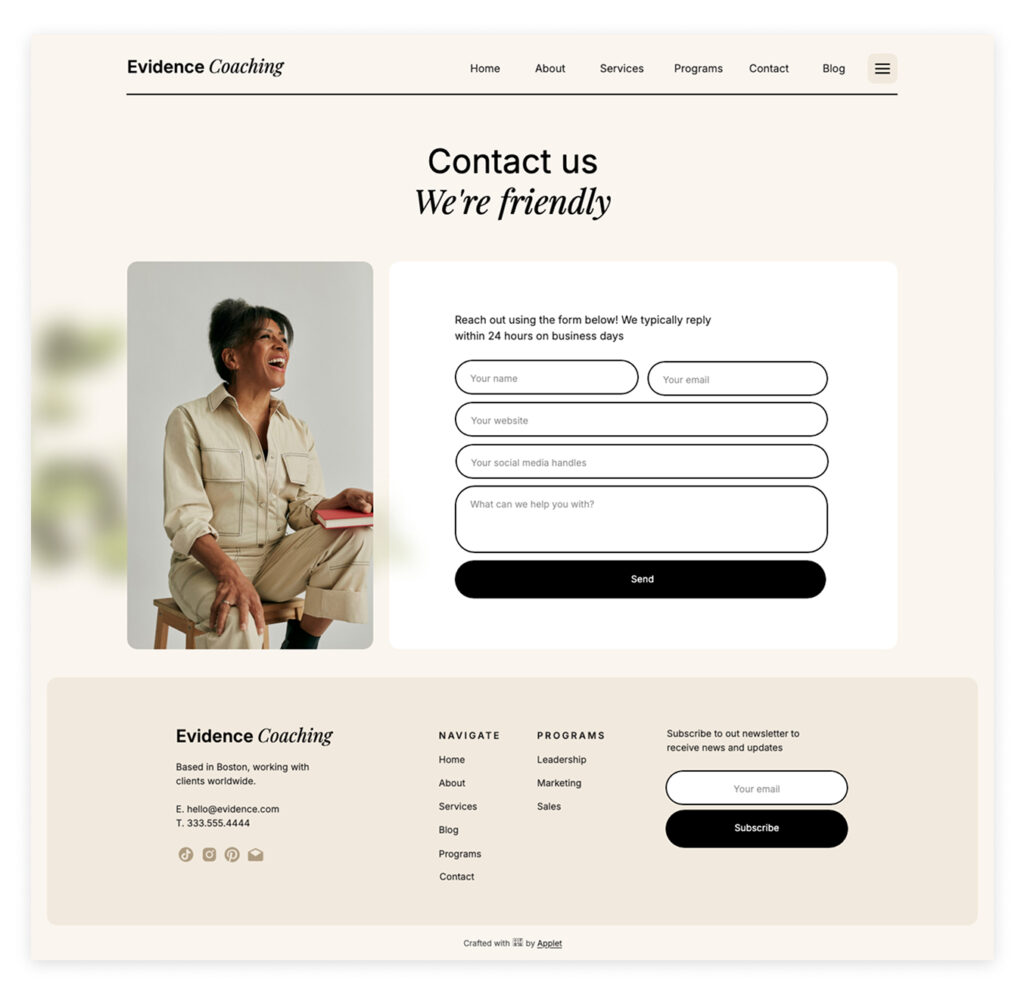
In Showit, use canvas sections to create this layout. Keep spacing generous and use clear headers like “Let’s Work Together” or “Get in Touch.”
Don’t forget mobile. Resize and test your layout to make sure it looks great on phones. Often, stacked sections perform better on smaller screens.
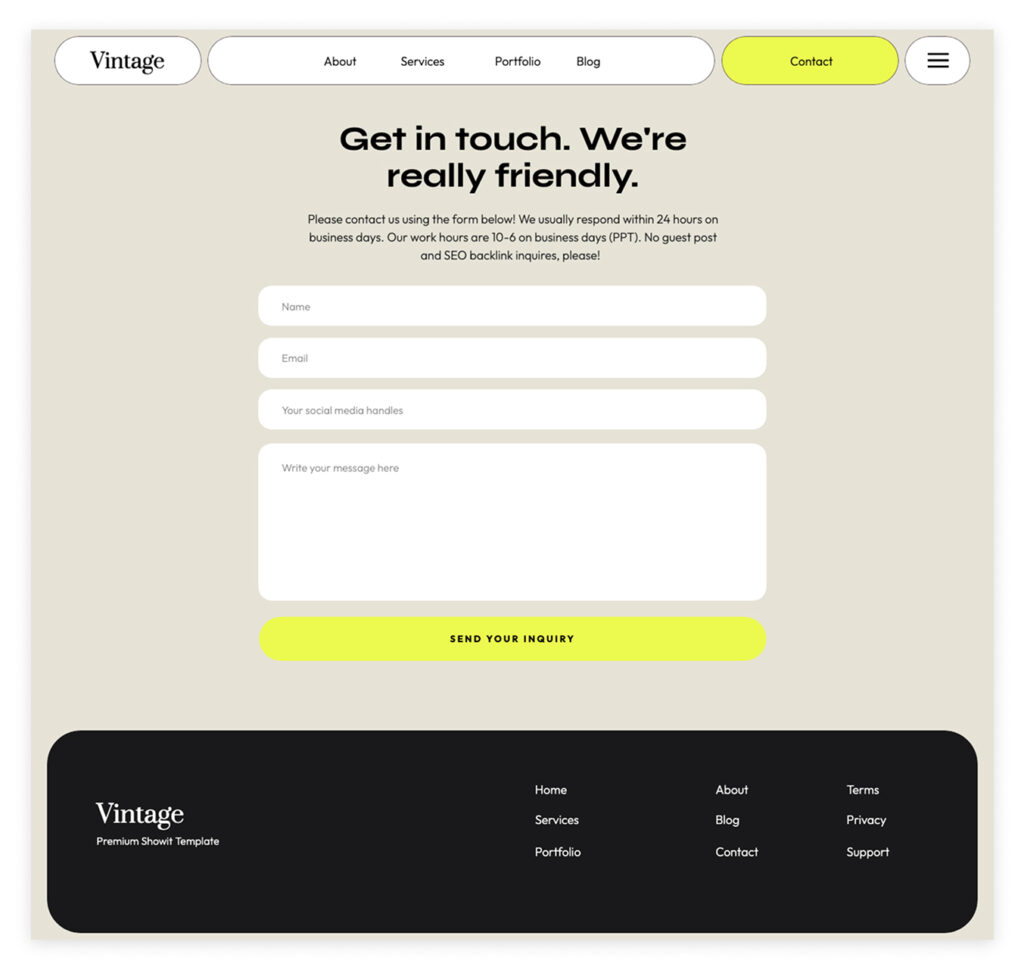
Craft a Thoughtful Contact Form
This is where the magic happens. And yet – too many contact forms are either too vague or way too complicated. Here’s what I recommend including on your Showit contact form:
Must-have fields:
- Name
- Email address
- Message
- “How did you hear about me?” (great for marketing insights)
Properly ordered input fields can enhance user experience by allowing easy navigation through the form using the ‘tab’ key.
Optional fields:
- Project type or service of interest
- Timeline
- Budget range
Keep the number of fields reasonable. You want just enough information to start a meaningful conversation – without scaring people off.
Customize or Embed Your Form
Showit offers a native contact form widget that’s easy to style and integrate. But if you’re using tools like Dubsado, HoneyBook, Flodesk, or Tally, you can embed their forms directly into your Showit canvas.
To embed a form:
- Grab the embed code from your form platform.
- In Showit, add an Embed Code box to your canvas.
- Paste the code.
- Resize as needed so the full form displays on desktop and mobile.
This lets you keep all your submissions in your external CRM while still keeping the look cohesive with your Showit site.
How to Set Up a Contact Form on Showit Using Built-In Tools
Unlike platforms that use classic form elements, Showit takes a more visual-first approach. Every form you build inside Showit is made of text boxes and shapes, giving you total control over the design. But that also means you need to understand a few quirks to make it work properly.
Here’s how to create a contact form using Showit’s native tools:
Add a Canvas for Your Form
- Create a new canvas or section on your contact page.
- This is where your form will live – stack your fields vertically for easier mobile formatting.
- Keeping your Showit site updated with the latest features can improve the functionality and appearance of your contact form.
Draw Shapes to Create Form Fields
- Use rectangle shapes to create the background of each field (e.g., Name, Email, Message).
- These are purely visual and won’t do anything unless paired with a text box.
Add Text Fields (Not Just Text)
- Add a text box inside each shape and select it.
- In the right-hand panel, go to the “Click Actions” area and turn this text box into a form input by assigning it a Form Field Type (Name, Email, Subject, etc.).
- You must select the correct type for each text field or the form won’t submit correctly.
Add a Submit Button
Use another shape or text box for your “Submit” button.
With it selected, go to the right-hand settings panel and scroll to Form > Type > Submit Button.
Set Form Actions
Below the form field settings, you can set what happens after submission:
- Show a message on the page
- Redirect to a thank-you page
- Display a notification bar
Check the Submission Destination
- Showit forms are sent to the email address associated with your Showit account.
- You can’t connect them directly to CRMs or marketing platforms unless you use an embed code from another tool.
Test Everything
- Before publishing, preview the form and submit a test message.
- Double-check that the correct fields are labeled and the submit button is working.
A Few Tips:
- You can style form fields and buttons however you like – just remember they need both a visible element and the correct form field type assigned.
- The simpler the form layout, the easier it is to make mobile-friendly and test.
If you’re ever stuck, Showit’s support documentation and live chat are helpful for troubleshooting form issues.
Submit Button & Confirmation Message
Please, don’t let your button say just “Submit.” Add personality.
Try:
- “Let’s Chat”
- “Send Message”
- “Say Hello”
And once a user clicks that button, make sure something happens – like a confirmation message that says: “Thank you! I’ll get back to you within 1–2 business days.”
You can also set up a redirect to a dedicated thank-you page, or add a notification bar confirming the message was received.
Make Sure It Works
Before you go live:
- Test your form across devices and browsers
- Fill it out as if you’re a client
- Confirm messages are going to the right inbox
If you’re using Showit’s built-in form, submissions will be emailed to the address linked to your Showit account. Double-check this in your site settings.
Want to go further? Use an autoresponder tool or integrate with a CRM to manage your messages more effectively.
Enhance Trust and Connection
Beyond the form, your contact page is a great place to reinforce connection and build confidence.
Here are a few ideas:
- Add a small FAQ below the form to pre-answer common questions
- Share your typical response time
- Include a client testimonial or two
- Add a photo of yourself to make it feel more human
- Link to your calendar if you want to offer scheduling
Optimizing for Conversions
Optimizing your contact form for conversions is crucial to turning visitors into leads and clients. Here are some strategies to help you achieve this:
- Clear and Concise Form Labels: Use straightforward labels for your form fields to ensure visitors understand what information is required. Ambiguity can lead to confusion and form abandonment.
- Minimize Form Fields: Keep your contact form simple by only asking for essential information. The fewer fields you have, the more likely visitors are to complete the form.
- Use a Prominent Call-to-Action (CTA): Your CTA button should stand out on your contact page. Use compelling text like “Get in Touch” or “Start Your Project” to encourage visitors to submit the form.
- Make It Mobile-Friendly: Ensure your contact form is easy to fill out on mobile devices. Test the form on various screen sizes to make sure it’s user-friendly.
- Use Social Proof: Adding customer testimonials or reviews to your contact page can build trust and credibility, making visitors more likely to submit the form.
- Offer Incentives: Encourage form submissions by offering incentives such as discounts, free consultations, or downloadable resources.
- Use a Notification Bar: After a form submission, a notification bar can confirm the submission and provide next steps, enhancing the user experience.
By implementing these strategies, you can increase form submissions and generate more leads for your business.
Troubleshooting Common Issues
Even the best-designed contact forms can encounter issues. Here are some common problems and their solutions:
- Form Not Submitting: Ensure the form is properly embedded on your Showit site and that the submit button is functioning correctly. Double-check the embed code if you’re using an external form.
- Error Messages: Make sure your form fields are properly validated and that error messages are clear and helpful. This guides users to correct mistakes without frustration.
- Spam Submissions: Implement a CAPTCHA or spam filter to prevent unwanted submissions. This keeps your inbox clean and ensures you only receive genuine inquiries.
- Form Not Sending Emails: Verify that the form is configured to send emails to the correct address. Check your Showit account settings to ensure the email address is accurate.
- Form Not Displaying Correctly: Ensure your form is styled correctly and that the CSS is properly applied. Test the form on different browsers and devices to ensure it looks and functions as intended.

By troubleshooting these common issues, you can ensure your contact form works smoothly and effectively generates leads for your business.
Measuring Success and Improvement
To measure the success of your contact form and continually improve its performance, track these key metrics:
- Form Submission Rate: Monitor the number of form submissions and the conversion rate. This helps you understand how many visitors are turning into leads.
- Form Abandonment Rate: Track how many visitors start filling out the form but do not complete it. High abandonment rates may indicate issues with form complexity or usability.
- Error Rate: Keep an eye on the number of errors users encounter when filling out the form. Frequent errors can deter users from completing the form.
- Spam Submission Rate: Track the number of spam submissions and adjust your spam filters as needed to minimize these.
Use analytics tools like Google Analytics to track these metrics and gain insights into your contact form’s performance. By analyzing this data, you can identify areas for improvement and make data-driven decisions to optimize your contact form, ultimately increasing conversions and generating more leads for your business.
Mistakes to Avoid
Even small issues can block people from reaching out. Watch for these:
- Form doesn’t work or isn’t connected
- No confirmation or thank-you message
- Too many form fields
- Vague or overly formal copy
- Poor mobile experience
A quick test once a month can save you from missing leads.
Final Touches Before You Publish
- Preview your contact page on both desktop and mobile
- Hit Save & Publish in your Showit dashboard
- Check that your embed code (if used) appears correctly
- Visit your page as a guest and try submitting a test inquiry
Make sure your page also appears in your site menu or footer, so users can find it easily. You can even experiment with a floating “Contact” tab or button for quick access.
Make It Easy to Connect
Your Showit contact page isn’t just a place to drop a form – it’s your digital handshake. When it’s clear, warm, and easy to navigate, more people will take that next step and get in touch.
Whether you’re a wedding photographer, brand designer, or service provider, small tweaks can make a big impact.
So go update your contact page. Add that friendly message. Test your form. And get ready to hear from more of the right clients.
You can always take a shortcut and install a template with a beautifully designed contact form. Take a look at the templates in our shop.
You’ve GOT what it takes
Download 30 marketing ideas on how to promote your website

